Let's Go On A Poetry Walk!

- Preview |
- Get Started |
- Comments
Activity Description
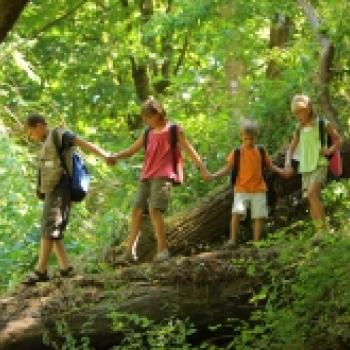
Read and discuss poetry with nature imagery with children. Then take the children on a poetry walk around the neighborhood or community to observe and collect sensory images from nature. The children will then use the sights, sounds, smells, and textures of the things they encounter outdoors to create poetry.
Why This Is Helpful
Poetry is most powerful when it is created by a poet’s own unique experiences and observations. Exploring nature allows the poet to get outside and find inspiration from nature. This activity allows students to learn about different types of poetry, challenge their vocabulary, and construct multiple types of poetry.
What You Need
- Paper
- Pen/Pencil
- Five Sense Observation Handout
- Recommended Nature Books for Children
- Acrostic Poems interactive tool or Acrostic Poems mobile app
- Diamante Poems interactive tool or Diamante Poems mobile app
- Theme Poems interactive tool or Theme Poems mobile app
- Haiku Poems interactive tool or Haiku Poems mobile app
- Poetry Example Sheet
Here's What To Do
Adjust your level of involvement depending on the child’s age and personality. A younger child might want more guidance while a teen is likely to prefer more independence.
- Introduce the poetry walk project. Explain that the poem can be about any aspect of nature they want to explore. Have the child tell you about the last time they were outside. What was it like? The temperature? The sights, sounds, smells, and textures?
- Choose one or two nature poems or Recommended Nature Books for Children to read to the child. Lead a discussion asking leading questions:
- What did you picture in your mind?
- What are some of the things that you can describe?
- Before heading out on the nature walk, handout and explain the Five Sense Observation Handout. The children should use this sheet to record their observations while on the walk and can use the back of the handout to draw pictures of what they are observing.
- Take children on a poetry walk around the neighborhood or community. Allow the children to set the pace of the walk to allow them to record their observations. They can also collect objects to take back with them such as rocks, pebbles, leaves, and small branches (no living things).
- Explain the different formats of poetry. Or you can let the child try the interactives or look at the Poetry Example Sheet to see how each works. Allow the child to select one format for their first poem.
- Guide the children to write ability-appropriate poetry using their observations from the poetry walk.
- Beginner: Triante Poem, Acrostic Poem
- Intermediate: Haiku, Diamante Poem
- Advanced: Freeform Poem, Theme Poem
- When the poem is complete, have the child read it aloud. Does the poet like the way it sounds? Do you – the audience – have any suggestions?
- Proudly display the child's work on a bulletin board, display case, or refrigerator.
More Ideas to Try
- Take it back outside! Grab some sidewalk chalk and let the child write the finished poem on the sidewalk or driveway.
- Get out the markers and crayons! Let the child create original illustrations that represent their poetry.
- Suggest that older children record their completed poems as a podcast. Use our activity How to Record Podcasts to guide you through the process.
- Share your work. Create a greeting card with your poetry and give it to a friend or loved one.
Saving Your Work With RWT Interactive Tools
Once you’ve finished your poem, use the saving capability within the interactive tool to save your file.
- On the final screen of the interactive, click Save Final.
- Name your file something that is descriptive of your poem, and click Save.
- Select a place on your computer or external drive to save the file, and click Save.
- For more information about the saving capability, see our RWT ReView: Saving Work With the Student Interactives.
Add new comment