Telling a Story About Me: Young Children Write Autobiographies
- Preview |
- Standards |
- Resources & Preparation |
- Instructional Plan |
- Related Resources |
- Comments
Overview
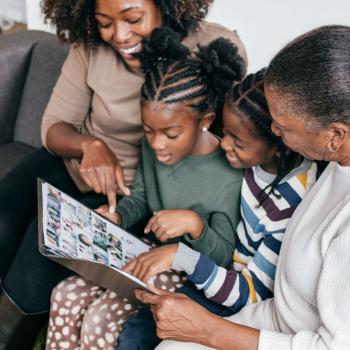
Developing ideas collaboratively, planning writing projects before executing them, and learning to compose sentences related to a specific topic are important skills for students to master. This lesson plan teaches these skills while drawing from the lives of first and second grade students who will write and publish autobiographies based on personal photographs. The lesson begins with the students working at home with their families to select and record relevant information about photos. Students then work in small groups and independently to create their autobiographies.
From Theory to Practice
- Autobiographical writing gives teachers a way to engage students and their families in literacy learning, creating a willingness to participate in literacy activities.
- Expanding students' knowledge of their community and themselves deepens their understanding of the reading and writing process.
When students write narratives about their own lives it helps them develop personal, social, and cultural connections.
Exploring their own life stories can provide a sense of direction and purpose for students that other forms of writing do not.
Common Core Standards
This resource has been aligned to the Common Core State Standards for states in which they have been adopted. If a state does not appear in the drop-down, CCSS alignments are forthcoming.
State Standards
This lesson has been aligned to standards in the following states. If a state does not appear in the drop-down, standard alignments are not currently available for that state.
NCTE/IRA National Standards for the English Language Arts
- 4. Students adjust their use of spoken, written, and visual language (e.g., conventions, style, vocabulary) to communicate effectively with a variety of audiences and for different purposes.
- 5. Students employ a wide range of strategies as they write and use different writing process elements appropriately to communicate with different audiences for a variety of purposes.
- 6. Students apply knowledge of language structure, language conventions (e.g., spelling and punctuation), media techniques, figurative language, and genre to create, critique, and discuss print and nonprint texts.
- 7. Students conduct research on issues and interests by generating ideas and questions, and by posing problems. They gather, evaluate, and synthesize data from a variety of sources (e.g., print and nonprint texts, artifacts, people) to communicate their discoveries in ways that suit their purpose and audience.
- 8. Students use a variety of technological and information resources (e.g., libraries, databases, computer networks, video) to gather and synthesize information and to create and communicate knowledge.
- 11. Students participate as knowledgeable, reflective, creative, and critical members of a variety of literacy communities.
- 12. Students use spoken, written, and visual language to accomplish their own purposes (e.g., for learning, enjoyment, persuasion, and the exchange of information).
Materials and Technology
- Photographs from home
- Writing and drawing tools
- Tape or glue for affixing photos
- Binding materials
- You Have to Write by Janet S. Wong (Margaret K. McElderry Books, 2002)
- Folders
- Chart paper and a marker
- Transparencies and a projector
Printouts
Preparation
| 1. | At least two weeks before beginning the project, send home the following items:
|
| 2. | Obtain and read You Have to Write by Janet S. Wong. This book uses poetry to describe a group of students looking for topics for a writing assignment. It encourages students to write about the things they see happening all around them in their own lives. If you can't find You Have to Write, try one of these alternative books with similar themes:
|
| 3. | Begin to work on an autobiography that you will make along with the students to model the process for them. You will need to collect your own photographs for the project and should prepare your own version of each of the handouts that the students are going to use. In class, you will refer to these versions as you record them on chart paper or transparencies. |
| 4. | When you collect the photos from students, scan or copy the pictures that will need to be returned. To provide additional photographs for their stories, you can also take pictures of the students at school. If any student is unable to bring in photographs from home, you can have him or her create illustrations to use for the project. |
| 5. | Have each student bring in a folder to use for storing his or her photos and work on the project. Make one copy of An Autobiography: Ideas For My Story, An Autobiography: Planning My Story, the cover sheet, and the dedication page, and four copies of the autobiography page for each student in the class. |
Student Objectives
Students will
- Engage their families in the learning process by working at home to select photographs that represent aspects of their lives
- Formulate ideas for an autobiography by working collaboratively and independently
- Practice their writing skills by composing sentences in the first person using themselves as subject matter and revising the composed sentences into a story
- Participate in a literacy community by reading their stories aloud in small groups
Session 1
| 1. | Read the book You Have to Write by Janet S. Wong aloud to the class. During preselected points during the reading, you may wish to stop and ask questions aimed at getting students to think about how they might use the suggestions in the book to come up with their own story ideas. There are no page numbers in this book, but two good places to stop include the page spreads with many small pictures on them. |
| 2. | After reading the book, ask students to share some ideas they could write about from their own lives. You might record these on a piece of chart paper or on the blackboard. |
| 3. | Tell students that they are going to begin work on a project to write stories about themselves and their lives. Explain that a story about a person, written by that person, is called an autobiography. |
| 4. | Remind students of the photos they have brought in from home and tell them that they will use these photos to give them ideas for their autobiographies. Share some photographs of yourself. Model the discussion you want them to have in their small groups by talking about what is happening in each photo and why it is important to you. For example:
|
| 5. | Divide the class up into small groups of four to five students each. Record the grouping of the students so they may return to these same groups for the remaining sessions and continue to work together. If this is a new activity for them, explain the expectations—they will speak quietly, demonstrate respect for other speakers by listening carefully, and not comment until the speaker is finished. |
| 6. | Give each student three or four minutes to share the photographs from home with another student in his or her group. Students may refer to the An Autobiography: Information About My Photos sheet, completed previously at home, to help them talk about their pictures. |
| 7. | Bring students back together and talk about how the things they said about their pictures can serve as first ideas for their autobiographies. On a large sheet of paper or a transparency, complete An Autobiography: Ideas for My Story sheet for your own story, acting as a model for the students. Try to write the same kinds of things they would, for example:
|
| 8. | Pass out the idea sheet to students, and give them 10 to 15 minutes to write or draw ideas. They should have at least one idea for each photo and can use their An Autobiography: Information About My Photos sheet as a reference. |
| 9. | Have students place their writing and photos in their project folders. Collect and review the folders to make sure that each student has listed ideas on his or her idea sheet. You might make comments or suggestions on these sheets to help students as they move into the planning stage. |
Session 2
| 1. | Begin by having students review their An Autobiography: Ideas for My Story sheets from Session 1 along with their photographs. |
| 2. | Encourage them to add one additional thought to their idea sheet, maybe a detail that they forgot the last time. |
| 3. | Have students get into their small groups from Session 1. Explain to them that they will be sharing their ideas and getting suggestions or responses from other members of the group. |
| 4. | Allow one or two minutes for each student to share with the group thoughts from his or her idea sheet. Each student in the group should then offer at least one suggestion or comment. |
| 5. | Tell students to record any additional thoughts they have as they share their ideas and listen to the comments and suggestions from their classmates. |
| 6. | Bring the class back together to talk about writing their stories. Emphasize that because they are writing autobiographies the stories need to be about themselves. Tell them that sentences will be written in the first person, and give them some examples: "My favorite things to eat are French fries and spaghetti." "When I was a baby I liked to rock with my mommy." |
| 7. | Have students generate some sentences about themselves in the first person and record them on chart paper. Keep the chart in a visible location to use as a reference for the remainder of the project. |
| 8. | Using a transparency or chart paper demonstrate how to use the An Autobiography: Planning My Story sheet. You should use your photographs and the ideas from your idea sheet. Remember to write your sentences in the first person and to focus on the subject matter of each particular photo. For example:
|
| 9. | Pass out the An Autobiography: Planning My Story sheet to students, and have them work on planning out their stories, keeping their photographs and idea sheets in front of them as they work. While students are working you should circulate throughout the room, providing support as needed. |
| 10. | Students should save all work in their project folders. Collect and review the folders to check students' composition of sentences. In addition to making sure that students have written more than one sentence for each photograph, check to make sure that sentence are written in the first person and that they relate to the subject of the pictures. Offer students feedback. |
Session 3
| 1. | Begin by having students review their An Autobiography: Planning My Story sheets, making revisions or additions if they choose. |
| 2. | Get out the planning sheet you created either on chart paper or a transparency during Session 2. Tell students that part of the writing process is making choices about which of the sentences they have written in the planning stages they will use in the final version. Select some sentences you will use for one photograph and then ask students to help you with the other three. Highlight or circle the ones you pick as you go along. |
| 3. | Have students choose sentences they would like to use in their own autobiographies. They can highlight or circle the sentences they choose. |
| 4. | Students should save all work in their project folders. |
Session 4
| 1. | Using chart paper or transparencies, share with students a couple of the pages you have completed for your autobiography. Remember to stress that they should be writing in the first person and that their writing should focus on the subject matter of the photograph. Distribute four copies of the autobiography page to each student. |
| 2. | For each page of the autobiography, each student should:
|
Session 5
| 1. | Any students who have not completed their autobiography pages should do so. (Note: If you need to, add another session for students to complete this work.) |
| 2. | Explain what a dedication page is–the place where the author of a book thanks the people who have helped him or her to write it. Read aloud the dedication page from You Have to Write and some other books in the classroom. Talk about how some are general and some are specific. Show them the dedication page from your autobiography and discuss why you have chosen to dedicate the book as you have. |
| 3. | Distribute the dedication page and give students time to fill it out, circulating and supporting them as necessary. Tell students they are welcome to add a picture of the person to whom the book is dedicated if they like. |
| 4. | Talk about what they usually see on the cover of a book–the title, the author's name, and a photograph or illustration. You might bring in some autobiographies or biographies to use as examples. You can also show them the cover you have created for your own autobiography. |
| 5. | Distribute a cover sheet to each student. Have them create covers for their autobiographies. Give them time to draw a self-portrait or other picture to decorate the cover. |
| 6. | Have students place all completed work in their folders. |
Session 6
| 1. | Tell students that they will now turn their autobiographies into books. Have your own autobiography ready for binding to show students how they can bind their pages into books. Easy bookbinding technique:
|
| 2. | Once the books are bound, have students get into their small groups where they can take turns reading aloud their autobiographies. |
| 3. | Bring students together for a group discussion about the project, focusing on what they have learned and how they feel about it. Questions you might ask include:
|
Extensions
- Invite families to school to share the published autobiographies of the students.
- Further develop students' autobiographical writing skills by using the Stapleless Book or the online ReadWriteThink Printing Press to have them write more about their lives.
Student Assessment / Reflections
Throughout this lesson, you may use the Assessment Guide to document observations of students in each of the five areas found in the lesson objectives: family participation, collaborative work, independent work, writing sentences, and reading aloud. There is also space to record other notes and observations.
Some questions to ask when using the Assessment Guide include:
- Family Participation–How much did the family participate in this project? Did they send in appropriate photographs and complete the work that needed to be done at home? Was the work done when requested?
- Collaborative Work–How did the student collaborate with his or her peers? Did he or she make appropriate suggestions? How did he or she accept suggestions about his or her own work?
- Independent Work–How did the student work independently during the project? Did he or she follow directions? How well did he or she stay on task when working independently?
- Writing Sentences–How did the student do at composing and writing sentences for the autobiography? Are the sentences on topic with the photographs? Are the sentences grammatically correct? What resources did he or she use to spell and write words (asking a peer, asking a teacher, the word wall, the dictionary, or using phonetic spelling)?
- Reading Aloud–How did the student do when reading the autobiography aloud? Could he or she read it independently or was assistance needed? How was the fluency of reading aloud?
I just wanted to express that your website was the only website I found that provided kid friendly material that an 8th year old child could read and easily understand. Your website will make this project an enjoyable one.
Thank you
Stacey Saballos
Thank you,
Patti Krusa
I just wanted to express that your website was the only website I found that provided kid friendly material that an 8th year old child could read and easily understand. Your website will make this project an enjoyable one.
Thank you
Stacey Saballos
Thank you,
Patti Krusa
Thank you,
Patti Krusa
I just wanted to express that your website was the only website I found that provided kid friendly material that an 8th year old child could read and easily understand. Your website will make this project an enjoyable one.
Thank you
Stacey Saballos
Add new comment